Wednesday, December 19, 2012

Once they all believed in dragons

Excerpt from 2011 Dear Diary -

December 23rd

Today one of my co-workers gave me a little Christmas gift. Nothing expensive, just unexpected. I should have just said thank you and left it at that. But no, the guilt blossomed like a rose in a too hot room and I said, “I have something for you, but I left it at home”. Had to stop at the store and buy something for him. New Years Resolution is to make a ton of little gifts so I don't have to fib!!

I remembered what happened last year and I am determined to follow through with my promise. No one is going to taunt me with "Liar, liar pants on fire." Umm...something just sparked my creativity (pun intended) and I'm thinking fire and two Viva Las Vegastamps - If you can't stand the heat and
Knight burned by dragon.
 

Before


After


Side/Back View


Supplies
Plain Old Box of Matches
Scraps of Checker Board Paper, Coordinating
Paper, Red Glitter Paper
Viva Las Vegastamps - HERE and HERE.
Miracle Tape
TH Black Soot Distress Ink

Directions  Remove the match drawer and set aside. No need to paint the box, just cover the top and bottom of the box using your trustworthy Miracle Tape. Apply the Checkered Paper on the top and the Coordinating Paper on the bottom. Let the red edge of the box show through. Cut strips of the Coordinating Paper and attach to sides of box. Be sure not to cover the sandpaper strike area. Stamp your VLVS images and distress heavily. Add TH Black Soot Distress Ink. Cut a square of the Red Glitter Paper. Attach all with the Miracle Tape. Cover the front and back of the match drawer with paper and fill with the matches or red fire hot candy. Repeat over and over again until you have a full stash of Dragon Decorated Match Boxes.

This little 15 minute gift is both fun and practical. What I really mean is this little gift is both cheap and easy. Remember that the next time you get that unexpected gift!

Monday, December 10, 2012

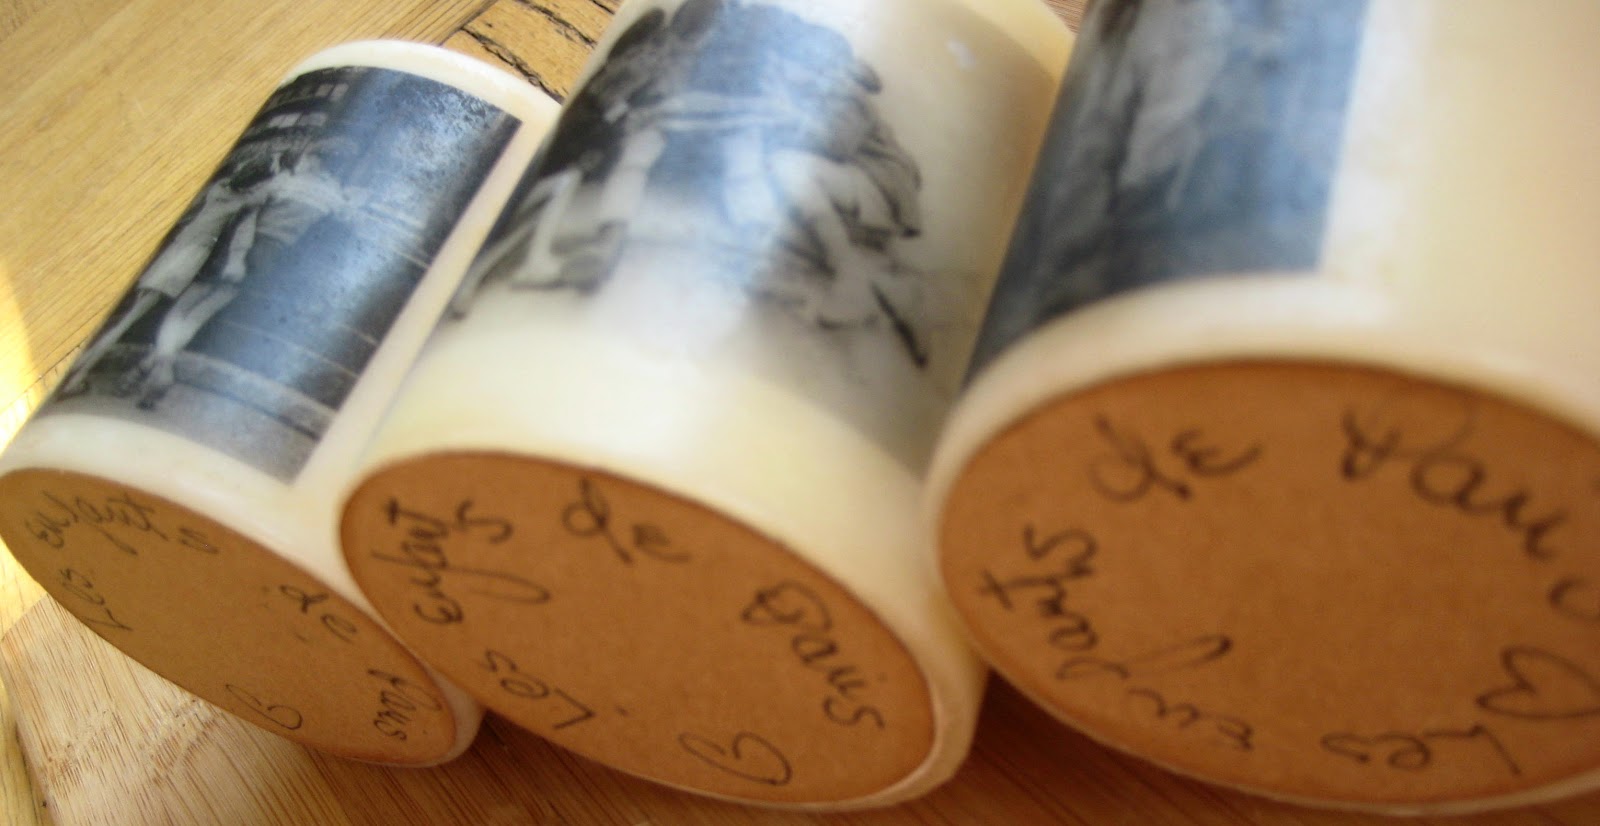
Les enfants de Paris

It was over 15 years ago, but I remember my first trip to Paris as if it were yesterday. Cassandra and I stayed in this tiny hotel near the Odeon Theatre. We had a Juliet balcony that overlooked the street and because Paris was in the midst of a heat spell, we kept the balcony doors open all day long. On the weekend there were children playing outside and I loved listening to them talk fluently in French. But it was their laughter that enchanted me - they laughed with a french accent.
 
I was asked to make favors for a party being held for a gal who loves all things French. I don't know why I picked candles but I was drawn to the vanilla scent while at the Dollar Tree and came home with an armload. I scoured Pinterest and YouTube in search of the perfect candle craft. When I happened upon the tissue paper candle I knew I had found my inspiration.
 
Remembering how magical the children of Paris were I decided to forgo the Eiffel tower and create Les enfants de Paris candles. At school, play and just enjoying the every day joy that Paris offers made making these favors a real treat for me. I hope you will view the short video I made with some tips on making the tissue paper candles. And you'll get to see them all dressed up for the party. The video is HERE.
 
My favorite candle is the one on the right.
Two little boys holding their mother's handbags! 
 

As always I used Kraft paper and TH Vintage Photo. 
 
I'd love to know what are your favorite last minute, inexpensive gifts? Do you make them? If so, please share with a link! 


Sunday, December 2, 2012

Festivus for the rest of us

December is filled to the brim with eagerly awaited holidays. Of course everyone knows it is the month of Christmas, Hanukkah and Kwanzaa, but did you know it was also the month of Repeal Day? Yep, as you sip on that glass of wine remember to thank Congress for repealing the 21st Amendment that ended Prohibition on December 5th. I’ll drink to that!

Another noteworthy day has to be December 16th. It’s National Chocolate Covered Anything Day. Need I say more? The 21st is Humbug Day, the 12th is National Ding-a-Ling Day (what is a Ding-a Ling anyone?) but my favorite holiday is celebrated on the 23rdFestivus Day.

I am relatively new to this holiday tradition but around my house it has become a major celebration. Never heard of it? It was conceived in 1966 but became a part of worldwide popular culture after being featured on an episode of Seinfeld in 1997.

Important aspects of the holiday include an unadorned aluminum pole called a Festivus Pole, and the practices of Airing Ones Grievances and Feats of Strength. Now, some folks describe this holiday as a parody of commercialism, but I for one will be sending out Festivus Cards to all my friends this year – thanks to VLVS. 

Every person who sends me a Holiday Card is getting a Festivus Card! 

The best thing is that the card smells yummy!

Supplies
Patterned Paper
Simple Patterned Paper
Silver Card Stock
Silver Washi Tape
Card Stock
Red Glitter Paper
MiracleTape
Festivus Stamp
Ink
Incense Stick
Silver Stickles
3 Bling

Directions
1. Cut and fold greeting card with white/off white card stock - 4” x 5 ½”.
2. Make six paper cuts: Patterned Paper 3 ¾” x 5 ¼”, Silver Paper 3 ¼” x 4 ¾”, Simple Patterned Paper – 2” x 5” and 1”x 3 ¾”, Red Glitter Paper – two 1” x ¼” pieces.
3. Stamp sentiment on 1” x 3 ¾” Simple Patterned Paper.
4. Wrap silver Washi Tape onto the 2” x 5” Simple Pattenred Paper.
5. Cut the incense stick to 3” and cover with Silver Stickles.
6. Using Miracle Tape glue all the cut papers and the Festivus Pole onto the card.
7. Attach the Bling and you are ready to send your card to your friends who celebrate Festivus.

A traditional Festivus Dinner does not include alcohol. I get around that critical omission by celebrating Festivus and Repeal Day together. I'll drink to that!
       
The winner of the role of Miracle Tape is...Dsscrapie. Send me your address and I'll mail out your goodies.

PS - I'm putting up an infomercial later today! Hope you'll take a look :-)

Tuesday, November 27, 2012

A Very Merry Unbirthday to You!

I have very mixed feelings about my birthday. On one hand, I am thrilled that I have made it through another year in good health. On the other hand, I hate growing older. On top of those bi-polar-ish feelings is that no matter what is planned by the husband, the day hardly ever lives up to my expectations.

This year I decided to take matters into my own hands. I have just two goals. One, instead of waiting for that special gift to appear on my doorstep, I am going to give out gifts. And two, to celebrate my birthday all month long. Well, almost – my birthday is December 17th so starting on December 1st my moniker will be “The Unbirthday Gift Fairy.”

My plan is to perform 17 anonymous Random Acts of Kindness.

To record the month I wanted to make something small so that I could keep it in my purse. A 3” Meandering Mini seemed like the perfect answer for this glorious celebration. I used my 7 Gypsies 6” paper pad I had coincidentally received as a RAK,  Miracle Tape, and two stamps from VLVS, the Practice Random Acts of Kindness and the December Daily Plate.  


 I cannot wait to get started!


Although I numbered each RAK my plan is to complete the tasks in no particular order. And, if needed, I am going to allow myself the flexibility to complete more than one task on any given day.

Now it’s time to give one of my followers a RAK. My favorite tape in the whole world is Miracle Tape. Seriously folks, the tape tares easily by hand and best of all I don’t need to use my tweezers to get the top layer off. One lucky follower will get a huge roll along with a little surprise. Want it? Leave a comment here or HERE on my YouTube Channel and check back next Sunday when I will announce the winner. A Very Merry Unbirthday to You!

PS - The husband is getting me a new camera for my Birthday!  No more fuzzy pictures!! And the day is going to be glorious!

Sunday, November 18, 2012

An Ode to Frank J. Wisner

The golden age of soda fountains began in the late 1800’s and lasted until the 1950’s. By the early 1920’s just about every drugstore had a soda fountain, a rather humble attempt to fill the social void due to prohibition. “The bar is dead, the fountain lives, and soda is king!”

Way back on a very hot summer day in 1893 Mr. Wisner, a Pharmacist with his own store in Colorado, ran out of ice. In an effort to sell his ice cream before it melted he started using the ice cream to cool the soda...it was an instant hit and the Root Beer Float was born.

Some choices regarding the Beehive were no brainers. Craft table – check, storage – check, flooring – check, paint colors – check etc. etc. etc. Only one thing caused me several sleepless nights - the bulletin board. I went back and forth and actually had 8 emails with a nice gal on Etsy regarding a custom BB for the Beehive. In the end I went with this….
 
I love the way it looks and I cannot wait to give it a taste!  
 
 ROOT BEER FLOAT
1.5 oz whipped cream vodka
1.5 oz Blackmaker Root Beer Liqueur
Club soda to top

Combine the ingredients in a rocks glass filled with crushed ice.
Stir well and serve chilled.
    

Update for Tanya – Sit down dear friend. It’s done!
 Harry & David approve and I hope so do you!


You can see the PEAR video HERE. Best to view with a Root Beer Float. Like, Love or Hate them? The float not the mini :-) A very Happy Thanksgiving to everyone!!!!

Sunday, November 11, 2012

This and That

In case you are curious, THIS is an update on the Beehive and THAT is an update on my crafting. Let's start with the THIS because that (not that THAT) is much more exciting.
 
Yesterday the husband hung my four valances on my four windows. We only had one argument and neither of us threatened Divorce so overall I consider it a very successful day. I splurged on the valances but in my defence - they are loaded with bees and they were made in the USA. I am waiting none to patiently for my Root Beer bulletin board. That's all the hint I am giving so check back next week for the reveal.
 
 The top shelves are where my stamps live in a colorful collection of cigar boxes.
Need more!
 
Now to the THAT. Another update without anything new to report. I am working on just one project. It is a mini album for the very patient Tanya. She sent me a beautiful mini which is displayed on the shelf above on the right. Please Tanya, don't give up on me!
 
Domestic Goddess and Pears - they go together don't they?
 

I had to work last weekend at an Artisan Fair (seriously folks, that is a part of my 9-5 job!) and one of the vendors gave me a box of dominos. I couldn't refuse his generosity so I lugged them home and went straight to Pinterest and Etsy to see what I could make with them. Lots of jewelry but I wanted to create something different. Haven't found anything that has caught my fancy but I did find a seller on Etsy who has gorgeous graphics. I bought one and now am ready to create something. Anyone have any ideas?

If I can't find something quickly the husband has threatened to take them to his work for his patients to play with. Doesn't he know that dominos are meant for art not play???

Sunday, November 4, 2012

Lost & Found - Memories

Have you ever totally forgotten a special memory and then you hear, see or even smell  something, and that memory comes flooding back? Had that happen to me just a few months ago.
 
A very nice and very talented gal on scrapbook.com forum (Terrihooper) offered to mail out an envelope of Vintage S & H Green Stamps to whoever wanted them. Within seconds of reading her post it all came back to me - a favorite childhood memory that I had, until that very moment, forgotten all about.
 
I remember as if it was yesterday how my sisters and I would pour through the S & H catalogue arguing about whose turn it was to pick out their favorite gift item. Selecting that “free” item to redeem was the reward for the hours we spent licking stamps.
 
I wanted to make something a bit more special than a card with my stamps and when I saw this STAMP from VLVS I knew immediately what I would create.
 

The box is one from the $1.50 bin at Michael’s and the paper I used is from last years Crate paper line.  What made the whole craft come together though was the fabulous stamp from Viva Las Vegas Stamps.
 

Supplies
Small Balsa Box
Paint
Patterned Paper
Mod Podge
Distress ink
Bling/Flowers
Green Stamps
Washi Tape
Paper
Ink
VLVS Stamp

 
Directions
Remove the knob and elastic closure from the Balsa Box.
Paint the box inside and out.
Cover the lid, the bottom of the box and the inside bottom with paper.
Ink the box with TH Distress Ink to give it a vintage look.
Using Mod Podge, paint a thin layer over the entire box, both inside and outside.
Stamp one S & H Green Stamp on paper.
Decorate with Washi Tape, Green Stamps, Flowers and your VLVS stamped image.
 

PS – The very last gift I got with my stamps was a cuckoo clock. Obviously I was suffering from a bad case of glue poison.